How to Start a Friendship Bracelet
To start a friendship bracelet, tie the strings with an overhand knot or make a loop, then hold the start still so you can pull each knot tight. Choose the start that suits how you want to close the bracelet. Arrange the strings in pattern order before you begin knotting.
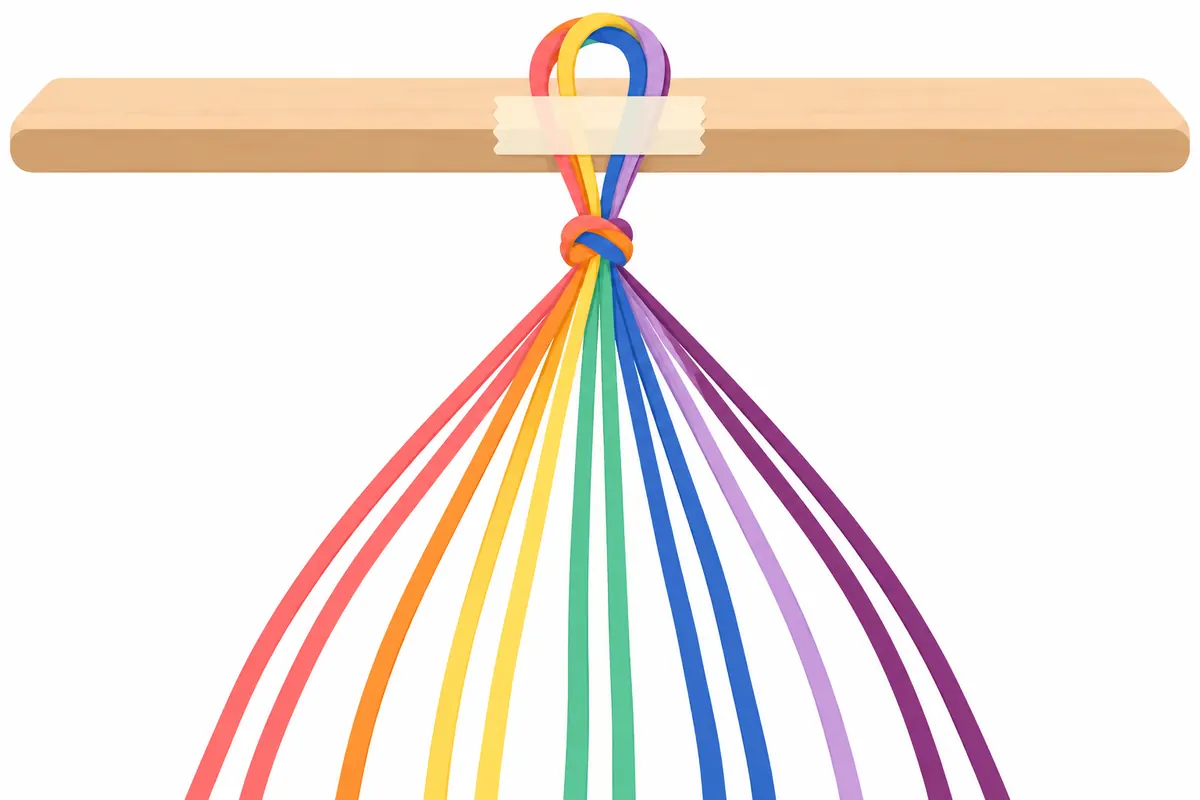
Choose an overhand knot or a loop
Use an overhand knot start when you plan to finish the bracelet with ties at both ends. Gather all strings together, leave about 8-10 cm free, and tie them together in one overhand knot. Keep the loose ends together; you will use them to tie the bracelet on later.
Choose a loop start if you want one end to close around a knot or braid at the other end. Fold the strings in half, then tie an overhand knot a little below the fold so a small loop stays. The loop will be at one end of the bracelet, and the loose strings will hang from the knot ready for arranging.
Before tying either start, check that you have the strings needed for the pattern. Keep the strands together as you knot so none slip out. Pull the overhand knot snug, but do not pull so hard that the strings stretch or fray.
Leave enough string for the finish
Leave about 10 cm at each end for the start and the ties. With an overhand knot, that means keeping a tail beyond the starting knot for tying the bracelet on. With a loop start, leave enough loose string at the other end to make ties or a braid that can pass through the loop.
String lengths are estimates, so allow room for the bracelet’s ties as well as its knotted length. If a string is too short, it may not reach the end comfortably. Keep the loose tails out of the way while you work, but do not trim them before the bracelet is finished.
Secure the start before knotting
Fix the starting knot or loop so it cannot slide while you work. Tape the start to a table edge, pin it to a cushion or jeans with a safety pin, or clip it to a clipboard. Place the fastener close enough to the knot that the strands stay grouped, without covering the strings you need to use.
Test the hold with a gentle pull on the strings. If the start shifts, secure it again before making the first knot. A steady start helps you pull knots tight and keeps the bracelet from twisting as you work.
Arrange the strings in pattern order
Lay the strings out in the order of the pattern before the first knot. Separate the strands so they hang side by side and do not cross. Strings are lettered A, B, C and onward from the left as they hang at the start, so check that the left-to-right order matches the pattern you are following.
Keep the start fixed as you arrange the strands. If you move a string across another by mistake, put it back before knotting. Starting with the right order makes it easier to follow each row and spot a misplaced strand early.
Hold the work as you make the first knots
Keep the starting knot or loop secured and let the strings hang freely. Use one hand to hold the working string and the other to guide the string it knots around. Pull each knot snug toward the previous one, using steady tension. Do not tug the whole bundle, which can loosen the start or tangle the strands.
After the first knots, pause and check that the work is straight, the strings remain in pattern order where they have not been used, and the starting knot has stayed in place. Then continue with the next knots in the pattern. Leave the end tails untrimmed until you are ready to tie the bracelet on.
Questions
How do you start a friendship bracelet with a loop?
Fold the strings in half and tie an overhand knot a little below the fold, leaving a small loop. Secure the loop, arrange the hanging strings in pattern order, and keep the loose ends for ties or a braid.
How much string should you leave at the start?
Leave about 10 cm at each end for the start and ties. For an overhand knot start, the starting knot uses the gathered strings; with a loop start, leave the opposite end long enough to finish and close the bracelet.
How do you keep friendship bracelet strings from moving?
Fix the starting knot or loop to a stable surface. Tape it to a table edge, pin it to a cushion or jeans with a safety pin, or clip it to a clipboard. Check that it stays put with a gentle pull before knotting.
What order should the strings be in before you start?
Lay them out in the order of the pattern, from left to right as they hang. Strings are lettered A, B, C and onward from the left. Separate crossed strands before making the first knot.