How to Read Friendship Bracelet Patterns
To read a friendship bracelet pattern, first identify whether it is a normal pattern with diagonal rows or an alpha pattern arranged as a grid. Then follow each knot symbol in order, using its color and arrow to choose the knot. Mark your place as you work so you can keep the bracelet aligned with the chart.
Identify the pattern type
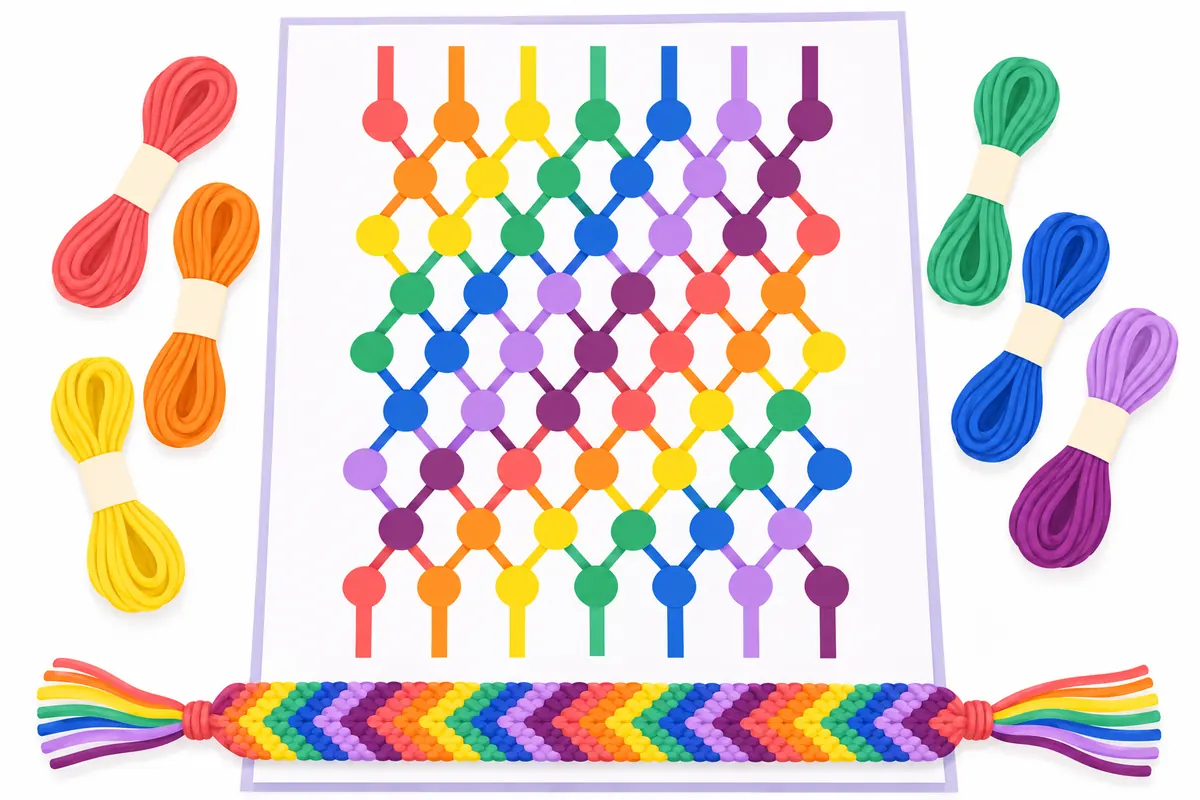
A normal pattern shows strings lettered A, B, C, and so on across the top, with each string’s color shown there. Its knots form diagonal rows. An alpha pattern is a grid: each square marks one knot and shows the color to use.
Check the pattern before you cut or arrange your embroidery floss (six-strand). For a normal pattern, note the color order of the strings as they hang at the start. For an alpha pattern, identify the base strings that run across the bracelet and the knotting strings that make the colored squares.
Read knots in a normal pattern
In a normal pattern, each circle is one knot. The circle’s color tells you which string makes that knot, and its arrow shows the knot type: ↘ means forward knot, ↙ means backward knot, > means forward-backward knot, and < means backward-forward knot.
Follow the circles across a row in the order shown. The first row pairs strings A-B, C-D, and so on. The next row shifts the pairs to B-C, D-E, and so on. Keep following the rows in sequence; when you reach the last row, start again from row 1.
A knot can change how the strings sit next to each other, so do not assume the starting order stays the same. At the end of each row, check the colors and string order against the next row before tying more knots.
A normal pattern: the candy stripe, tied with forward knots
Letters are the strings at the start, circles are knots, arrows are the knot kind. Tap a knot to light the two strings that tie it.
Circle = knot in its colour. ↘ forward, ↙ backward, > forward-backward, < backward-forward. Letters = strings, left to right at the start.
Shows one repeat of 8 rows; the pattern then starts again.
Follow an alpha pattern grid
In an alpha pattern, each square is one knot in the color shown. Work across the grid one row at a time, tying each square in sequence across the base strings. The grid’s width is the number of base strings.
Tie the first row from left to right with forward knots. Tie the next row from right to left with backward knots. Continue row by row, following the square colors and changing direction as each row calls for it. Mark the row you are on so you do not skip or repeat one.
Keep the base strings in their starting order as you work. The knotting strings carry the colors into the grid; use the chart’s squares to track where each color belongs across the row.
An alpha pattern: a checkerboard chart
Each square is one knot and each column is one row of tying. Tap a column to move the highlight.
Row 1 → · 2 Snow White, 2 Black, 2 Snow White, 2 Black
Each square is one knot and rows run left to right. The highlighted column is the row you tie now.
Keep your place as you work
Mark the row you are on after finishing it. Before moving to the next row, check the order of colors at the end of the row against the next row. This is especially helpful in a normal pattern, where the pairs shift between rows, and in an alpha pattern, where the tying direction alternates.
The bracelet looks like the diagram turned on its side. If the finished rows seem to run in a different direction from the chart, compare the knot colors and sequence rather than turning the string order around. Keep each knot snug and consistent as you follow the pattern.
Questions
What do the arrows mean in a normal bracelet pattern?
Each arrow names a knot type: ↘ is a forward knot, ↙ is a backward knot, > is a forward-backward knot, and < is a backward-forward knot. The circle’s color shows which string makes the knot.
How do I know which strings to knot in a normal pattern?
Strings are lettered A, B, C, and so on from the left as they hang at the start. The first row pairs A-B, C-D, and so on; the next pairs B-C, D-E, and so on. Follow the rows in order.
Which direction do I tie an alpha pattern?
Tie the first row left to right with forward knots. Tie the next row right to left with backward knots, then keep following the grid row by row. Each square is one knot in its displayed color.
Why does my bracelet look different from the pattern diagram?
A finished bracelet looks like the diagram turned on its side. Check that the knot colors and row sequence match the pattern, and that you are following the correct knot arrows or alpha row direction.